So that I can keep my racing reports and blog entries separate from those regarding the build of my car, I've started a new blog at the following link.
My Racing Blog
It starts by giving you link to my 2010 Race Calendar.
Wednesday 30 December 2009
Friday 18 December 2009
Putting a roof over my head
Fitting the weather gear at the moment - not finished yet but worth mentioning that in trying to screw the first popper base above the wheel arch (as the Assembly Guide stipulates), the screw head sheared off. After I'd regained a certain amount of composure, I eventually drilled the screw out and will rivet the popper bases instead.
On this evidence, I can't recommend following the Assembly Guide...
On this evidence, I can't recommend following the Assembly Guide...
Thursday 3 December 2009
Registered and Road Tested

Got my registration documents through last week and promptly got my registration plates made. Having donned them to the front and rear of the car, I made the most of the dry, sunny weather on Friday to put the first road miles on the car.
What a great experience. Here was a car that I had built myself, stopping, accelerating and steering without a problem.
When the clouds came in, I returned home and only managed a short trip of about 8 miles. But I'm on the road.
Thursday 26 November 2009
Yet another inspection but registered at last
In the end the registration process took less than a week.
My application was dealt with really quickly by the good people at Northampton DVLA. A chap called me Tuesday morning to arrange an additional inspection performed by the DVLA. As I said before, I wasn't overly keen about this but there was no avoiding it. In fairness, the guy at the DVLA was really nice and recognised my frustration.
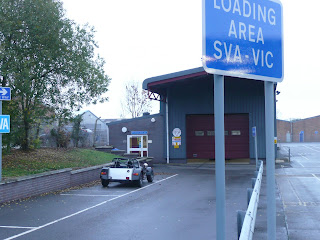
Wednesday morning had me off to the DVLA again. It took 25 mins to load the car to the trailer, 20 mins to get to the DVLA office, 30 seconds for the inspection, 2 minutes of chit-chat, 20 mins trip home and 25 mins to unload the car. All in a round trip of about about 90 mins for a 30 second VIN check... which had already been done by VOSA at significant cost to me.
Full credit to the Northampton office: the day after I had my inspection, I received my registration number and tax disc. Therefore, tomorrow I will get my number plates, tell Richard Egger (my insurance provider) and I've got myself a road car!
Nothing to it...
My application was dealt with really quickly by the good people at Northampton DVLA. A chap called me Tuesday morning to arrange an additional inspection performed by the DVLA. As I said before, I wasn't overly keen about this but there was no avoiding it. In fairness, the guy at the DVLA was really nice and recognised my frustration.
Wednesday morning had me off to the DVLA again. It took 25 mins to load the car to the trailer, 20 mins to get to the DVLA office, 30 seconds for the inspection, 2 minutes of chit-chat, 20 mins trip home and 25 mins to unload the car. All in a round trip of about about 90 mins for a 30 second VIN check... which had already been done by VOSA at significant cost to me.
Full credit to the Northampton office: the day after I had my inspection, I received my registration number and tax disc. Therefore, tomorrow I will get my number plates, tell Richard Egger (my insurance provider) and I've got myself a road car!
Nothing to it...
Monday 23 November 2009
Registered with the registration people
I visited the DVLA in Northampton with a pile of paperwork today. Certificate of Newness, Original Invoice, IVA Pass Certificate, V55 form, Assembly Form (forgotten the correct name for it but it's a DVLA form listing the manufacturer of the major components), Driving License (photo ID), Medical card (address ID), Insurance Certificate and a cheque for tax and registration fee (£245 - £190 tax and £55 first registration fee).
I swapped all that for a compliments slip with a DVLA stamp on it - I'm a little worried about this... Within 48 hours, I'm supposed to get a call from someone telling me whether I need to present my car for inspection. I blew £540 on my IVA certificate and this still isn't enough and I'm a bit miffed by this. Even the two girls at the DVLA couldn't tell me why I might have to re-present my car.
I hope I'll have a registration mark soon after that - which means I can get a tax disc, register my insurance fully and finally get on the road! And I can't wait!
As a footnote, my Mum and Dad have generously given me a private plate for my car as a Xmas pressie. Thank you very much and I love you loads.
IVA PASSED!
In the time it took me to pay my re-test fee, the good chaps at VOSA Leighton Buzzard had checked everything that needed to be re-evaluated on my car. It passed but not until I'd had to sweat over the speedo (it didn't seem accurate at first).
I also had to be 'innovative' about the studs around the windscreen as didn't have anything to cover them effectively - some grommets I ordered from e-bay didn't arrive in time (though ordering them earlier would have helped...). Incidentally, I used a 10mm length of washer tube, split lengthways, and unrolled over the stud to get it through. Just put a tiny bit of superglue to hold it in place.
So £540 (£450 IVA fee plus £90 re-test fee) lighter and a massive step closer to being registered for the road.
Saturday 14 November 2009
Back from Caterham
Picked the car up today having had a new diff and speed sensor fitted to try and get the speedo to work. The diff is quieter and the speedo seems to work. Just got to IVA-proof the car... And book it in for its re-test.
Sunday 8 November 2009
Exhaust Bracket
Just noticed the picture I've got of the exhaust bracket on my blog post below shows it upside down. The bracket should angle downwards from the car.
End of post...
End of post...
Friday 6 November 2009
IVA
 The big test - this replaced the SVA test as a sign of road-worthiness of the car. Tales of the lottery of the IVA made me nervous.
It was done at Leighton Buzzard and the chap who did the test was a really helpful. It's a thorough check which starts with making sure there are no sharp edges using the 100mm ball. Then it's on to a check of the underside and setting of the headlights. The brakes were tested and OK so the speedo needed doing next. Typically, my luck ran out on the one component that wasn't checked on the road test during the PBC. The speedo wasn't working.
Brilliant.
The rest of the check was fine and despite the speedo, there were one or two easy things to fix but we needed to check the speed sensor we'd replaced after the failure in the PBC. When I went to start the car, the ignition fuse blew as it had with Caterham.
In a nutshell, I have a problem around the wiring associated with the speed sensor/speedo. If I disconnect the speed sensor, the car starts but when it starts with the speedo sensor fitted (assuming the ignition fuse doesn't blow) the speedo doesn't work.
It'll be dropped off with Caterham next week to replace the diff and check the speedo...
Post Build Check


Took the car to Caterham Midlands for its Post Build Check (PBC). This service is included in the price of the car and includes them doing a spanner check and a look over to offer advice for the IVA.
Arran did the check and raised the car on a ramp to check everything underneath before doing a similar job from above. The car started OK and after a bit of fiddling to get a decent idle speed, he operated everything in order to make sure everything worked. A new hazard light switch was fitted to replace the dodgy one I had before a bit of a disaster. Just as we tried to start the car to go on a road test, the ignition fuse blew. Replacing the fuse only resulted in another fuse blowing so Arran whipped off the rear-wheel speed sensor and the car started - albeit without a speedo. The road test confirmed I had a VERY noisy differential so after all the bloody effort of getting it in the car - it will be replaced under warranty. Sadly the warranty only covers parts on a self-build (and so to avoid having to go through the frustration of re-fitting for the hundredth time) Caterham will fit it for me.
After I got home, Darren fitted the new speed sensor and the car started OK. Next up I IVA-proofed the car (copious amounts of silicone sealant, rubber trim and nut caps). The list I had from Caterham and the other bits I protected are based on protecting any 'sharp' edges that can be hit by a 100mm sphere. Imagine rolling a ball across all surfaces of the car and any projection from the body greater than 5mm needs to have a cover put on it if the 'corner' is deemed to be sharp by VOSA. 'Sharp' means different things to different parts of the car... All very clear then. At some point, I'll put the list of what I did on this blog but until I pass the IVA, it's a pointless exercise.
One last thing of significance... My hood-sticks are missing. This means I can't fit my weather gear, which means I can't fit my boot cover... Another shortage being sorted by Caterham but it also means I have to cover all sharp edges in the boot. A productive day became a frustrating one.
Ahead by a nose

Not much to say in this but I've pretty much finished the build now...
My wife put the nose badge on the car and once it was fitted, the main build was finished. Still to come is the work required for the IVA (covering nuts and bolt heads etc) and work required for racing.
IT LIVES!
Cars shouldn't start without the ignition key in...
However, this was the problem we had when we went to crank for oil pressure for the first time. Disconnect the trip switch on the bulkhead and connect the battery - and the engine tries to start!
After a plea to the Caterham Motorsport community (as well as a chat with John, Wes Fox's Chief Engineer...) I found that I'd put too many cables out of the battery positive terminal and in effect was 'hot-wiring' the car. In short, the cables for the back of the starter solenoid are really obvious - there are two pins to bolt to and one is larger than the other. There are three cables to attach and two of them will fit on the larger diameter pin while the other only fits on the smaller pin. Pretty obvious in the end...
Another point about the battery cables is to fit the negative cable to the bell-housing. The Assembly Guide suggests the outermost hole but they're all outermost on the circular bell-housing... I've connected mine to the one you'll see through the rear cooling U-Hose.
So once I'd sorted this out, I could crank the engine and finally start it. And after turning for 10-15 seconds, it started. My wife videoed the the magic moment and I'm toying with the idea of putting it on here but I look really daft with a very camp-looking clap when it starts so I'm reluctant...
Just a quick foot-note to apologise for the less-detailed posts at the moment. I've been on holiday and I've been working on the car constantly to prepare it for a pre-booked Post Build Check and IVA. Lots to do!
Fibre Glass and ability to see!
Now that the majority of the mechanicals are done, I could concentrate on the wings and wheel covers. The hole marks provided by Caterham on the front wings are not exactly right so anyone reading this will need to check. As a result, the 15mm hole I drilled resulted in the fibre glass resin cracking between the hole and the edge of the wing. Fortunately, Darren (one of my my neighbours) has a repair kit and did an excellent job in fixing it.

While I was here, I fitted the front lights. There's a lot of fiddling with wires here and the 6-pin plug for the lights needs to be built. Sadly, the Assembly Guide doesn't give the right colour combinations to choose from so I matched the colours to the cables already on the car.
 Darren is now helping regularly (in fact, he's spending more time in my garage than at home). He got the rear arches on and did the rear lights. Once you do one side, use the rubber strip that you need to cut as a template for the other side.
Friday 23 October 2009
Keeping Cool
After the exhaust, I finished the cooling system. All the hoses are in - I had to find the thinnest hose (it was in the 'Shortages' box but not labelled as cooling hose). Lots of cutting later (including trying to decipher the hose requirements without a heater...) and a copious amount of jubilee clips and it was done.


A couple of points about the radiator... Don't over-tighten the nuts that hold the fan on - it's all just aluminium and I managed to pull one of the threaded pins through the support bar. Only tighten until you can see a couple of threads past the nut.
And the aluminium spacers in with the radiator must go between the rubber support bobbins and the rad - two per thread keeps the assembly off the front roll bar.
It's exhausting
Got the exhaust in next. The down pipes are fiddly to get in so make sure you protect the edge of the bodywork where the tubes come through. Find your own way to get them in but keep an eye on their location in the hole through the bodywork.
 The rest is fairly straightforward except for one thing. The springs that hold the cat on to the downpipes don't fit so I had to cut the the ends off one set of the hooks. Stretch the spring as far as it will go and mark the length against the other hook. I then just put a Dremmel cutter to it.

Last thing is the bracket that supports the silencer. The Assembly Guide shows a different support bracket (attached to the car) to the one in the kit. Thanks again to the Caterham Motorsport forum community.
 Radiator next...
The rest is fairly straightforward except for one thing. The springs that hold the cat on to the downpipes don't fit so I had to cut the the ends off one set of the hooks. Stretch the spring as far as it will go and mark the length against the other hook. I then just put a Dremmel cutter to it.
Last thing is the bracket that supports the silencer. The Assembly Guide shows a different support bracket (attached to the car) to the one in the kit. Thanks again to the Caterham Motorsport forum community.
 Radiator next...
Sunday 18 October 2009
Hoisting the engine in
In with the heavy lifting gear today and I had some help from Paul (he who collected the car with me). He'd lent me his engine hoist and was the best chap to operate it.


Once I'd made sure the chassis was protected, the engine was lowered into position nice and slowly. I recommend the starter motor gets fitted in advance of the engine being lowered in (I didn't and it was REALLY difficult to get the three bolts in).
The engine needs some persuasion to get it on the bell-housing (and on to the shaft coming out of the gearbox) but we got there in the end.


Just keep an eye on the Assembly Guide as there are a few mistakes - mainly which bolt goes where but it's pretty clear where the errors are.
Also, you need a 9mm (-ish) hex-head long reach socket (or, more likely, an imperial equivalent) for the LH mount - but I don't have one and can't find one so torquing it up will have to wait...
Getting in gear
Got the gearbox in today. I know that the Assembly Guide says to fit the gearbox and bell-housing to the engine before you load it but a rumour I might have heard while chatting to some Midlands-based people who work for a niche motor manufacturer who I recently picked a CKD car up from... said to fit it in stages.
It had been filled with oil (keep it tilted with the propshaft attachment up after the oil goes in as it leaks when it's not in the car and attached). So it was heavy. And I know I shouldn't but I fitted on my own. I jacked it up and then lifted it into position. Luckily, it caught the propshaft OK and slotted in nicely. After that, the bell-housing was a doddle.

It had been filled with oil (keep it tilted with the propshaft attachment up after the oil goes in as it leaks when it's not in the car and attached). So it was heavy. And I know I shouldn't but I fitted on my own. I jacked it up and then lifted it into position. Luckily, it caught the propshaft OK and slotted in nicely. After that, the bell-housing was a doddle.
Blimey - it's a car
Seats went in today which makes it look even more like the finished thing - albeit powered by the Fred Flintstone or Newton method.

It's worth pointing out at this point that it might have been wise to fit the steering column BEFORE the driver's seat went in as you really need to load the lower column from 'inside' of the car. I know I'm jumping ahead but I had to load the column from the front of the car and scratched the panel that the steering rack fits to. And make sure the transmission tunnel trim goes in before both seats, too (it will go in if one has been fitted).
The driver's seat was really fiddly. In short, fit the front bolts into the floor first but don't slide the sliders too far to manage this as it then sits too far back. When they're tight, get in, slide the seat all the way forward, struggle to get out as your 6-foot frame unfolds itself, take a few breaths as you won't have been breathing properly for about 30 seconds, then lift the back of the seat slightly and reach in down the back with the bolts to attach the rear.
Like I said - it's fiddly.
Riveting stuff...
Finished all the riveting on Thursday night in the hope that the seats could go in on Friday. Just watch your fingers...
Incidentally, I had to make sure I used the right rubber strips in the right place. You get four pieces in the kit and two are shorter than the others. I found the longer pieces were good for along the sill while the shorter pieces were good for the shoulder line rail. Make sure you check the lengths are correct before you commit to putting them on. Additionally, I only had to cut a notch in the strips by the sharp bend on the inner panel at the bottom of the shoulder line - the strip fits OK if you drill then rivet each hole one at a time.

Incidentally, I had to make sure I used the right rubber strips in the right place. You get four pieces in the kit and two are shorter than the others. I found the longer pieces were good for along the sill while the shorter pieces were good for the shoulder line rail. Make sure you check the lengths are correct before you commit to putting them on. Additionally, I only had to cut a notch in the strips by the sharp bend on the inner panel at the bottom of the shoulder line - the strip fits OK if you drill then rivet each hole one at a time.
Tuesday 13 October 2009
Mind your fingers
Now finished the rear suspension - caliper bolts go to 35Nm (it is written in the Assembly Guide at the end of the Rear Suspension section).
While fitting the rubber beading along the sill, I was struggling with a stubborn rivet and all of a sudden it locked into place and the rivet tool slammed shut with my middle finger trapped between the two arms. Cue a huge amount of pain, a lot of wailing, a surprisingly small amount of swearing and a large blood-blister on the end of my finger.
My hearing seemed to have a rest for about 20 minutes after I did it too. Very bizarre...
Sunday 11 October 2009
Heads, shoulders, knees and rears...!?
Frankly, the last few days have been very productive. I spent Friday, some of Saturday and some of Sunday working on the car. On Friday, I set about trying to finish the rear suspension - starting with loading the driveshafts. I wasted a long time trying to re-sit one of the metal bands that keeps the rubber boots on the driveshaft - I got it eventually...
Before I got to fit them, I had my wife help me load the roll cage onto the car. It's a big, heavy frame and needed both of us to get it in position. Sadly, I managed to scratch one of the rear-most posts but these things happen - it's a racecar but I'm still a bit disappointed.


So I could be getting on with the rear, I attached the flexible brake hose, and started on the ends of the De-Dion tube. Pretty simple stuff and no problems putting it together. You have to properly attach part of the roll cage in order to get the rear spring/damper units in. A major point to note is that the bolts needed to attach the top of the spring damper unit comes from the Rear Suspension fastener pack (the Assembly Guide suggests they're from the Rear Axle pack). The bottom bolts are important to get right and resulted in my only major swearing from the weekend. Despite the advice in the Assembly Guide to remove the rear bolt from the A-Frame, I ploughed on and started to cross thread the lower bolt. As it's an imperial bolt, my metric thread restorer struggled but an M12 x 1.25 was just big enough to take the edge off the damage and the bolt went in OK. MAKE SURE YOU REMOVE THE REAR A-FRAME BOLT BEFORE TRYING TO FIT THE REAR SPRING?DAMPER UNITS!!!
While I was here, I fitted the nylon washers to the rear A-Frame bolt which I found in the Rear Axle box (they're in a small plastic bag with the big washers used under the hub nuts).

The knee panels were next and these have proven to be the most difficult parts to fit. At first glace they don't fit but to cut a long story short, I slid them in behind the rubber beading and re-drilled the holes in the inner black panel. This put new holes in the knee panel and I was able to put the screws in - but I missed the furthest forward hole as there isn't enough screws!

So just the rear brake pipes to bend and attach to the calipers before finishing the rear suspension (I've also got to attach and set the handbrake cable - after the transmission tunnel trim is in). Next is to finish the rubber beading and riveting on the inside panels before getting on with the gearbox, bell-housing and engine.

Just a footnote to say I got to take a look at one of 2009's cars as John Whittaker lives 20 mins from me. From the trip I found the speed sensor is now fitted to a rear Anti Roll Bar bracket (the speed sensor bracket doesn't seem to exits), and the knee panels look different. Thanks to John for this - it was a great help.
Friday 9 October 2009
Here, there and everywhere
Just to complete the pictures of the front suspension...


You'll see the steering rack is now in - I can't finish the front until the engine's in.
As I need some help in getting the engine in, I figured I should start on the rear suspension. As the diff is now firmly in place, I put the brake pipes on the De-Dion tube and set about assembling the calipers {note that when you offer the rigid brake pipes against the De-Dion tube, you have to form them to the shape of the tube by pushing them GENTLY against the De-Dion. Additionally, the ends that will ultimately attach to the caliper will stick up in the air - these will require bending to suit}.
Sadly, the caliper assembly instructions are incomplete in the Assembly Guide. Therefore, I can't be sure of the torque to apply to hold the two halves of the caliper together. There is a good guide on the Caterham Motorsport Forum sent to a 2009 racer. Follow this link to find it.
As I can't get the rear spring/damper units fitted until after the roll-cage goes on, I set about putting the seats in - starting with the seat belts (or racing harnesses!). There isn't a torque value quoted for the shoulder straps so I've assumed them to be the same as the lap straps for the time being.
Anyway - there are a couple of things to look out for. There are two holes in the transmission tunnel where you have to mount the inner lap strap - make sure you use the forward one (it's the one with the riveted indented panel beside it). Hopefully this piccie will help - I got it wrong the first time (and I felt like an idiot!)...

Secondly, you need to drill two holes for the crotch straps for the 6-point harness through the floor. I checked several times to make sure the holes were in the right place BEFORE I started drilling. Additionally, I started with a small pilot hole from above before drilling the hole to the correct size from below.

Once I got the harnesses in, I tried fitting one of the seats - but I had to stop before fitting it altogether as I need to add the rubber piping on the inner panels (by the sill) but I can't do that until the roll cage is in.
The harnesses look good...

Just make sure the lap straps are fitted the right way round...

So I went back to the rear suspension. I got the radius arms fitted OK, and then the A-Frame. Only the upper radius arm bolt is torqued at the moment so still lots to do. Driveshafts next...


So I've been from the back to the middle and to the back again. I've got three potential options for continuing - the engine and gearbox, the roll-cage or the driveshafts. Not really sure which to do next...
Wednesday 7 October 2009
Missing parts have arrived
Just to mention that the steering rack arrived on Monday and has been fitted as much as the Assembly Guide allows (it has to be finished when the engine's in).
And the Gearbox Fastener pack and gear lever arrived on Tuesday.
I've now got two more boxes to add to the dozen-or-so I already had...
And the Gearbox Fastener pack and gear lever arrived on Tuesday.
I've now got two more boxes to add to the dozen-or-so I already had...
Tuesday 6 October 2009
What a 'differential' a day makes...
Having spend most of Friday looking for parts, Saturday was a day out of the garage. On Sunday afternoon, I decided to tackle the differential as I couldn't make any headway on the gearbox.
The diff is a big lump of metal used to direct drive from the propshaft (which runs parallel to the car in the transmission tunnel) through 90 degrees to the rear wheels. A point to note here is how essential it is to place the propshaft in the transmission tunnel before the diff gets fitted - if not, you have to remove the diff again.
Once we (my wife helped with this) had done all the lifting, measuring and general fettling to get the diff in place, we tried to line the bottom mounting bolts up. This is where progress ground to a halt for a while. Much head-scratching, swearing and chin-rubbing later and we were no nearer - the distance between the mounting points on the chassis was LESS than the two mounting points on the diff.
A plea went out to the Caterham Motorsport community and they didn't disappoint. Use a narrower bolt to support the diff through the top mounts and the bottom mounts line up. Get the lower bolts in and replace the temporary bolts in the top with the correct long bolt.
Those who feel nervous about gratuitous use of a rubber mallet might want to get someone to help with the next bit as having coated the top bolt with copper slip, it needs to be soundly walloped to get it through the diff. After 10-15 mins of smacking it (good for the aggression relief), the bolt was through and I could get the nut on as necessary. Except, I'd forgotten to put the washer under the bolt head which was 11 inches, two chassis mounts, two diff mounts and about 15 washers away! I was not amused...
Anyway - after all that, the diff's fitted. But not before I had to remove it for a third time to make sure the washers were fitted the right way round. In places, they're chamfered and the chamfer has to be towards the rubber mount where appropriate.
So I can now choose to press on with the gearbox/bell-housing/engine fit or continue with the rear suspension.
Saturday 3 October 2009
Found it...
Done absolutely nothing on the car today but thanks to those who answered my plea on the Caterham Motorsport forum, I found the clutch release mechanism.
That is all.
That is all.
Friday 2 October 2009
A frustrating day
So I'm not getting the steering rack for a couple of days. I carried on today trying to prep the chassis for taking the engine and gearbox. All I achieved was fitting the horns, the engine mounts and the handbrake lever and cable.
I spent most of my day looking for parts, breaking them, going to the shop to replace them, or looking for parts. I also spent a bit more time looking for parts.
Eventually, I found the earth cable that fits to the LH engine mount - it was in the right box but had slipped under one of the flaps at the bottom... What hasn't turned up is the clutch release mechanism and gearbox fixing pack. I'll have to order these from the Caterham factory but they won't receive the order until Monday...
In the meantime, I think I can get on with the propshaft, diff and rear suspension (which is why I fitted the handbrake).
Some front suspension pictures... finally
Finally my pictures are working so here are a couple of shots of the front suspension going in. I've moved on a bit since...


The following is a picture of the bolt at the top of the spring/damper unit. As mentioned below it was a real paid.

Still waiting for the Steering rack...
Bizarrely, I can upload images taken on my mobile so if these don't look as good it's for that reason.
Right, I've fitted everything at the front except the steering rack. You should know that it's not arriving today after all. It was only sent today and assuming the courier Caterham use deliver on a Saturday, I'll now get it tomorrow.
I've now attached the braided hoses to the calipers which was tricky as the hoses aren't too flexible. Additionally, the Assembly guide describes a small and a large copper washer to go on the banjo bolt but all the washers are now the same size. I still need to find out if the anti-rattle washers supplied with the banjo bolts are needed...

Roll bar went on OK but bear in mind that the balls shouldn't be pushed all the way into the sockets as the bush mounts might go past the chassis rail. This picture might help...

Or it might not...
I'm now moving on to some chassis prep before the engine goes in. I've drilled the holes for the washer bottle bracket but as the Assembly Guide doesn't specify which rivet is needed, Caterham Midlands have suggested 'any that's long enough that will also accept a small washer on the inside'. There is a long rivet in the Fastener pack with all the others so I'll take three of those.
The horns are relatively easy once you've got the 13mm nut loosened (which I did by holding the horn on the boss that the nut is on in some grips). Up next was the washer nozzle which is horrible. In order to hold the plastic nut so that the nozzle can screw in, I taped it onto a 10mm socket which was on a 6" extension. Tighten it with a 13mm socket on the extension but only by hand - even then I managed to split the nut (which resulted in the first swear word of the day). A quick trip to Allen's Motor Services and a replacement was sourced (along with a spare nozzle). For the record, it's an AUTOBAR WASHER JET - DOUBLE - 841. It's exactly the same.

I'm off to tackle some riveting - I really hope that the holes are in the right place.
And there's an additional item turning up tomorrow: a fuel filler cover (which I think I've got already...).
Wednesday 30 September 2009
Front Suspension going in
I wish I could show you some pictures to go with this post but the site seems to be crashing at the point where I upload them so I'll put them up another day.
After a few frustrating moments, several post-watershed utterances and less grazed knuckles than I thought, the front suspension is nearing completion. I've just got to attach the roll bar, and tighten the braided brake hoses to the calipers. Then the female brake unions need doing and that's it.
A few difficulties along the way: I think the upper wishbone is best to attach after you've fitted the spring/damper unit as it gives you a but more space to manoeuvre it in. Then the top bolt to attach the spring/damper unit is an absolute nightmare to remove and re-install. This was easily the most frustrating thing - the only way I found to accomplish the task was to screw it millimetre by millimetre. It took ages.
Apart from that, I learnt to make sure I read the instructions properly - particularly when fitting the 'upright' (screw the plain nut fully home before undoing it again) - and I'm just waiting for my steering rack before feeling like the front is done.
On that subject, the rack should be here on Friday. Caterham now have them but they're waiting for brake pads (which I hadn't realised were missing) to arrive tomorrow before sending them all out to me.
One last bit of chat for this post: I asked my wife to help so that she could be part of the process and I couldn't have built the front without her assistance. It was certainly a two person job on occasion.
Tuesday 29 September 2009
I learnt a lot at Mallory
Not strictly build-related but having spent the day looking at cars in various states of build, I learnt how some of the pieces go together. Additionally, speaking with the chaps doing the Caterham Support gave me some tips for the future.
Having been and seen some cars, I could clearly see what I could do while I wait for the steering rack.
I've now built the majority of the front suspension and I'll post something more on this tomorrow.
Finally, it was great to see some of the fellow Academy 10 entrants - all of them mixing a look of enthusiasm, amusment, excitement and terror in one...!
Friday 25 September 2009
Let the fun begin
Paul (a friend with a van) turned up at my house at 8am. By 8:30, we were bacon-buttied and on our way to Dartford. The 2-hour trip down the M11 proved uneventful with us having missed the worst of the traffic. We got to Caterham at 10:30 and waited a short while for Brian (Sean was off sick!) to help us load the van and trailer with the necessary goodies.


It wasn't what I expected. The chassis got wheeled out on a trolly and left to one side but then the engine got brought out on a lift - we had to load it back on to a wooden engine pallet before strapping it down to the floor of the van. The bigger surprise was a pallet full of a variety of boxes containing everything needed for the build from tie-wraps to a roll cage. The stack was over two meters high...


After an hour and a half of moving and stacking boxes, lifting and strapping-down the chassis and debating the use of a tarp, we were on our way back. Paul chose a different route home which resulted in a trip of over four hours... Seemed like we exhausted our traffic luck in the morning.

The whole super-jigsaw's in the garage now - I've just been out to have a quick check of the contents of the boxes. I think it's all there but the pick-list isn't ordered by box...
One last thing. Brian at Caterham told me the steering rack is the only missing component and it'll be sent as soon as possible - a quick check of the instructions shows the sterring rack is the first item to be fitted...
Thursday 24 September 2009
I collect the kit tomorrow
I've confirmed I can go to Caterham and collect my kit tomorrow. Once I get it back, I'll have to do a stock check (make sure everything's there).
Then the building fun begins!
Then the building fun begins!
Friday 18 September 2009
Welcome to my Build blog
Hello All
This is the start of the blog detailing the progress of my Caterham Academy car build. I'll put progress reports as and when appropriate.
With a bit of luck, I'll be picking my kit up next week which will then start the whole adventure (actually it started back in February 2008 when I paid my deposit...).
I can't wait.
Subscribe to:
Posts (Atom)