In the end the registration process took less than a week.
My application was dealt with really quickly by the good people at Northampton DVLA. A chap called me Tuesday morning to arrange an additional inspection performed by the DVLA. As I said before, I wasn't overly keen about this but there was no avoiding it. In fairness, the guy at the DVLA was really nice and recognised my frustration.
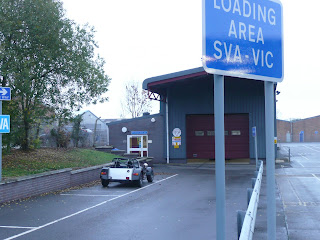
Wednesday morning had me off to the DVLA again. It took 25 mins to load the car to the trailer, 20 mins to get to the DVLA office, 30 seconds for the inspection, 2 minutes of chit-chat, 20 mins trip home and 25 mins to unload the car. All in a round trip of about about 90 mins for a 30 second VIN check... which had already been done by VOSA at significant cost to me.
Full credit to the Northampton office: the day after I had my inspection, I received my registration number and tax disc. Therefore, tomorrow I will get my number plates, tell Richard Egger (my insurance provider) and I've got myself a road car!
Nothing to it...
Thursday, 26 November 2009
Monday, 23 November 2009
Registered with the registration people
I visited the DVLA in Northampton with a pile of paperwork today. Certificate of Newness, Original Invoice, IVA Pass Certificate, V55 form, Assembly Form (forgotten the correct name for it but it's a DVLA form listing the manufacturer of the major components), Driving License (photo ID), Medical card (address ID), Insurance Certificate and a cheque for tax and registration fee (£245 - £190 tax and £55 first registration fee).
I swapped all that for a compliments slip with a DVLA stamp on it - I'm a little worried about this... Within 48 hours, I'm supposed to get a call from someone telling me whether I need to present my car for inspection. I blew £540 on my IVA certificate and this still isn't enough and I'm a bit miffed by this. Even the two girls at the DVLA couldn't tell me why I might have to re-present my car.
I hope I'll have a registration mark soon after that - which means I can get a tax disc, register my insurance fully and finally get on the road! And I can't wait!
As a footnote, my Mum and Dad have generously given me a private plate for my car as a Xmas pressie. Thank you very much and I love you loads.
IVA PASSED!
In the time it took me to pay my re-test fee, the good chaps at VOSA Leighton Buzzard had checked everything that needed to be re-evaluated on my car. It passed but not until I'd had to sweat over the speedo (it didn't seem accurate at first).
I also had to be 'innovative' about the studs around the windscreen as didn't have anything to cover them effectively - some grommets I ordered from e-bay didn't arrive in time (though ordering them earlier would have helped...). Incidentally, I used a 10mm length of washer tube, split lengthways, and unrolled over the stud to get it through. Just put a tiny bit of superglue to hold it in place.
So £540 (£450 IVA fee plus £90 re-test fee) lighter and a massive step closer to being registered for the road.
Saturday, 14 November 2009
Back from Caterham
Picked the car up today having had a new diff and speed sensor fitted to try and get the speedo to work. The diff is quieter and the speedo seems to work. Just got to IVA-proof the car... And book it in for its re-test.
Sunday, 8 November 2009
Exhaust Bracket
Just noticed the picture I've got of the exhaust bracket on my blog post below shows it upside down. The bracket should angle downwards from the car.
End of post...
End of post...
Friday, 6 November 2009
IVA
 The big test - this replaced the SVA test as a sign of road-worthiness of the car. Tales of the lottery of the IVA made me nervous.
It was done at Leighton Buzzard and the chap who did the test was a really helpful. It's a thorough check which starts with making sure there are no sharp edges using the 100mm ball. Then it's on to a check of the underside and setting of the headlights. The brakes were tested and OK so the speedo needed doing next. Typically, my luck ran out on the one component that wasn't checked on the road test during the PBC. The speedo wasn't working.
Brilliant.
The rest of the check was fine and despite the speedo, there were one or two easy things to fix but we needed to check the speed sensor we'd replaced after the failure in the PBC. When I went to start the car, the ignition fuse blew as it had with Caterham.
In a nutshell, I have a problem around the wiring associated with the speed sensor/speedo. If I disconnect the speed sensor, the car starts but when it starts with the speedo sensor fitted (assuming the ignition fuse doesn't blow) the speedo doesn't work.
It'll be dropped off with Caterham next week to replace the diff and check the speedo...
Post Build Check


Took the car to Caterham Midlands for its Post Build Check (PBC). This service is included in the price of the car and includes them doing a spanner check and a look over to offer advice for the IVA.
Arran did the check and raised the car on a ramp to check everything underneath before doing a similar job from above. The car started OK and after a bit of fiddling to get a decent idle speed, he operated everything in order to make sure everything worked. A new hazard light switch was fitted to replace the dodgy one I had before a bit of a disaster. Just as we tried to start the car to go on a road test, the ignition fuse blew. Replacing the fuse only resulted in another fuse blowing so Arran whipped off the rear-wheel speed sensor and the car started - albeit without a speedo. The road test confirmed I had a VERY noisy differential so after all the bloody effort of getting it in the car - it will be replaced under warranty. Sadly the warranty only covers parts on a self-build (and so to avoid having to go through the frustration of re-fitting for the hundredth time) Caterham will fit it for me.
After I got home, Darren fitted the new speed sensor and the car started OK. Next up I IVA-proofed the car (copious amounts of silicone sealant, rubber trim and nut caps). The list I had from Caterham and the other bits I protected are based on protecting any 'sharp' edges that can be hit by a 100mm sphere. Imagine rolling a ball across all surfaces of the car and any projection from the body greater than 5mm needs to have a cover put on it if the 'corner' is deemed to be sharp by VOSA. 'Sharp' means different things to different parts of the car... All very clear then. At some point, I'll put the list of what I did on this blog but until I pass the IVA, it's a pointless exercise.
One last thing of significance... My hood-sticks are missing. This means I can't fit my weather gear, which means I can't fit my boot cover... Another shortage being sorted by Caterham but it also means I have to cover all sharp edges in the boot. A productive day became a frustrating one.
Ahead by a nose

Not much to say in this but I've pretty much finished the build now...
My wife put the nose badge on the car and once it was fitted, the main build was finished. Still to come is the work required for the IVA (covering nuts and bolt heads etc) and work required for racing.
IT LIVES!
Cars shouldn't start without the ignition key in...
However, this was the problem we had when we went to crank for oil pressure for the first time. Disconnect the trip switch on the bulkhead and connect the battery - and the engine tries to start!
After a plea to the Caterham Motorsport community (as well as a chat with John, Wes Fox's Chief Engineer...) I found that I'd put too many cables out of the battery positive terminal and in effect was 'hot-wiring' the car. In short, the cables for the back of the starter solenoid are really obvious - there are two pins to bolt to and one is larger than the other. There are three cables to attach and two of them will fit on the larger diameter pin while the other only fits on the smaller pin. Pretty obvious in the end...
Another point about the battery cables is to fit the negative cable to the bell-housing. The Assembly Guide suggests the outermost hole but they're all outermost on the circular bell-housing... I've connected mine to the one you'll see through the rear cooling U-Hose.
So once I'd sorted this out, I could crank the engine and finally start it. And after turning for 10-15 seconds, it started. My wife videoed the the magic moment and I'm toying with the idea of putting it on here but I look really daft with a very camp-looking clap when it starts so I'm reluctant...
Just a quick foot-note to apologise for the less-detailed posts at the moment. I've been on holiday and I've been working on the car constantly to prepare it for a pre-booked Post Build Check and IVA. Lots to do!
Fibre Glass and ability to see!
Now that the majority of the mechanicals are done, I could concentrate on the wings and wheel covers. The hole marks provided by Caterham on the front wings are not exactly right so anyone reading this will need to check. As a result, the 15mm hole I drilled resulted in the fibre glass resin cracking between the hole and the edge of the wing. Fortunately, Darren (one of my my neighbours) has a repair kit and did an excellent job in fixing it.

While I was here, I fitted the front lights. There's a lot of fiddling with wires here and the 6-pin plug for the lights needs to be built. Sadly, the Assembly Guide doesn't give the right colour combinations to choose from so I matched the colours to the cables already on the car.
 Darren is now helping regularly (in fact, he's spending more time in my garage than at home). He got the rear arches on and did the rear lights. Once you do one side, use the rubber strip that you need to cut as a template for the other side.
Subscribe to:
Posts (Atom)